|
Embrace the tantalizing world of barbecue chicken sandwiches, where smoky, savory flavors meet the warmth of freshly toasted buns. These beloved creations have long held a cherished place in the hearts of food enthusiasts, offering a comforting blend of tender grilled chicken, tangy barbecue sauce, and a medley of delectable toppings. In this article, we dive into the delicious universe of barbecue chicken sandwiches, celebrating their enduring popularity as a comfort food that satisfies cravings and warms the soul. From mastering the art of grilling to crafting the perfect homemade sauce, we'll share the mouthwatering barbecue chicken sandwich recipes that will leave your taste buds longing for more.Part 1: The Perfect Barbecue Chicken for a BBQ Chicken SandwichAchieving tender, flavorful barbecue chicken is a culinary triumph of a barbecue chicken sandwich. Start by marinating the chicken in your favorite sauce or a homemade blend for at least 30 minutes, allowing the flavors to penetrate the meat. When grilling, use a two-zone cooking method: sear the chicken over high heat for a few minutes on each side, then move it to indirect heat to finish cooking gently. This prevents overcooking and preserves juiciness. Basting with sauce in the final minutes adds a mouthwatering glaze. Remember, perfect barbecue chicken balances smoky char and moist tenderness for a delightful sandwich centerpiece.Part 2: 3 Barbecue Chicken Sandwich Recipes for Different FlavorsHere are 3 different recipes offer a range of flavors, from the classic to the inventive, ensuring there's a barbecue chicken sandwich for every palate. Enjoy experimenting with these delicious creations!Recipe 1: Classic Barbecue Chicken SandwichIngredients:


Read more about Barbecue Receipts and Grills Tips at foxheightspubandgrill blog
0 Comments
Embrace the tantalizing world of barbecue chicken sandwiches, where smoky, savory flavors meet the warmth of freshly toasted buns. These beloved creations have long held a cherished place in the hearts of food enthusiasts, offering a comforting blend of tender grilled chicken, tangy barbecue sauce, and a medley of delectable toppings. In this article, we dive into the delicious universe of barbecue chicken sandwiches, celebrating their enduring popularity as a comfort food that satisfies cravings and warms the soul. From mastering the art of grilling to crafting the perfect homemade sauce, we'll share the mouthwatering barbecue chicken sandwich recipes that will leave your taste buds longing for more.Part 1: The Perfect Barbecue Chicken for a BBQ Chicken SandwichAchieving tender, flavorful barbecue chicken is a culinary triumph of a barbecue chicken sandwich. Start by marinating the chicken in your favorite sauce or a homemade blend for at least 30 minutes, allowing the flavors to penetrate the meat. When grilling, use a two-zone cooking method: sear the chicken over high heat for a few minutes on each side, then move it to indirect heat to finish cooking gently. This prevents overcooking and preserves juiciness. Basting with sauce in the final minutes adds a mouthwatering glaze. Remember, perfect barbecue chicken balances smoky char and moist tenderness for a delightful sandwich centerpiece.Part 2: 3 Barbecue Chicken Sandwich Recipes for Different FlavorsHere are 3 different recipes offer a range of flavors, from the classic to the inventive, ensuring there's a barbecue chicken sandwich for every palate. Enjoy experimenting with these delicious creations!Recipe 1: Classic Barbecue Chicken SandwichIngredients:
Read more about Barbecue Receipts and Grills Tips at foxheightspubandgrill blog
Patio heaters are a game-changer when it comes to extending outdoor living spaces into the cooler months. Whether you're hosting a backyard party or simply enjoying a quiet evening on the patio, a patio heater can keep you warm and comfortable. These heaters come in various types, including propane, electric, and natural gas, each offering its own set of benefits.While many patio heaters now come with convenient electronic ignition systems, manual ignition is still a crucial skill to have. Knowing how to light a patio heater manually ensures that you're prepared for any situation, especially when electronic ignition fails or when you're using an older model that doesn't have it. In this article, we'll discuss the different types of patio heaters and provide detailed reviews of three popular models that require manual ignition.Part 1: Understanding Patio Heater CategoriesPropane Patio Heaters: Propane patio heaters are a popular choice among homeowners due to their versatility and portability. These heaters are powered by propane gas tanks, providing a steady and adjustable heat source. They are easy to use and require minimal setup. However, it's important to ensure proper ventilation when using propane patio heaters to prevent the buildup of harmful carbon monoxide gas.Electric Patio Heaters: Electric patio heaters are a convenient option for those who have access to an electrical outlet near their outdoor space. These heaters are easy to operate and offer instant heat. They are also more energy-efficient compared to propane heaters. However, the downside is that they may have limited mobility and require a power source.Natural Gas Patio Heaters: Natural gas patio heaters are a permanent heating solution that requires a natural gas line connection. These heaters provide a constant heat source and are usually more powerful than propane or electric heaters. They are ideal for larger outdoor areas but may require professional installation. It's important to note that natural gas patio heaters cannot be moved around once installed.
Read more about Barbecue Receipts and Grills Tips at foxheightspubandgrill blog
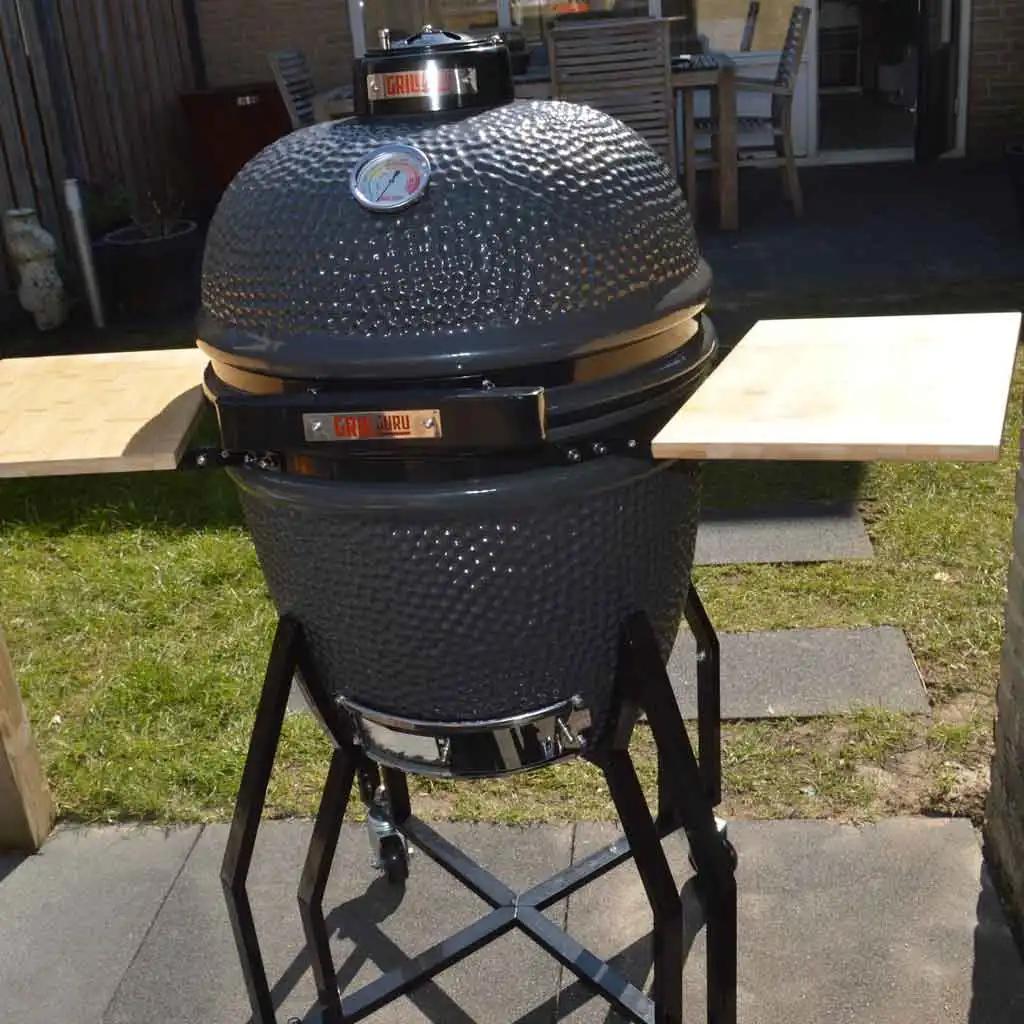
When it comes to outdoor grilling and barbecues, Grill Guru is a brand that stands out from the rest. With a wide range of high-quality products designed to enhance your grilling experience, Grill Guru has become a trusted name among barbecue enthusiasts. In this in-depth review, we will explore the history and background of Grill Guru, what sets them apart from other barbecue brands, and dive into detailed reviews of their top-tier offerings.Part 1: History and Background of Grill Guru You Should KnowGrill Guru was founded by a group of passionate grillers who wanted to take their outdoor cooking to the next level. With a shared love for barbecue, they set out to create innovative products that would make grilling easier, more enjoyable, and produce mouthwatering results.What separates Grill Guru from other barbecue brands?Grill Guru prides itself on the quality and craftsmanship of their products. Each item is designed with attention to detail and built to last. They prioritize not only functionality and performance but also aesthetics, ensuring that their products look as good as they perform.
Read more about Barbecue Receipts and Grills Tips at foxheightspubandgrill blog
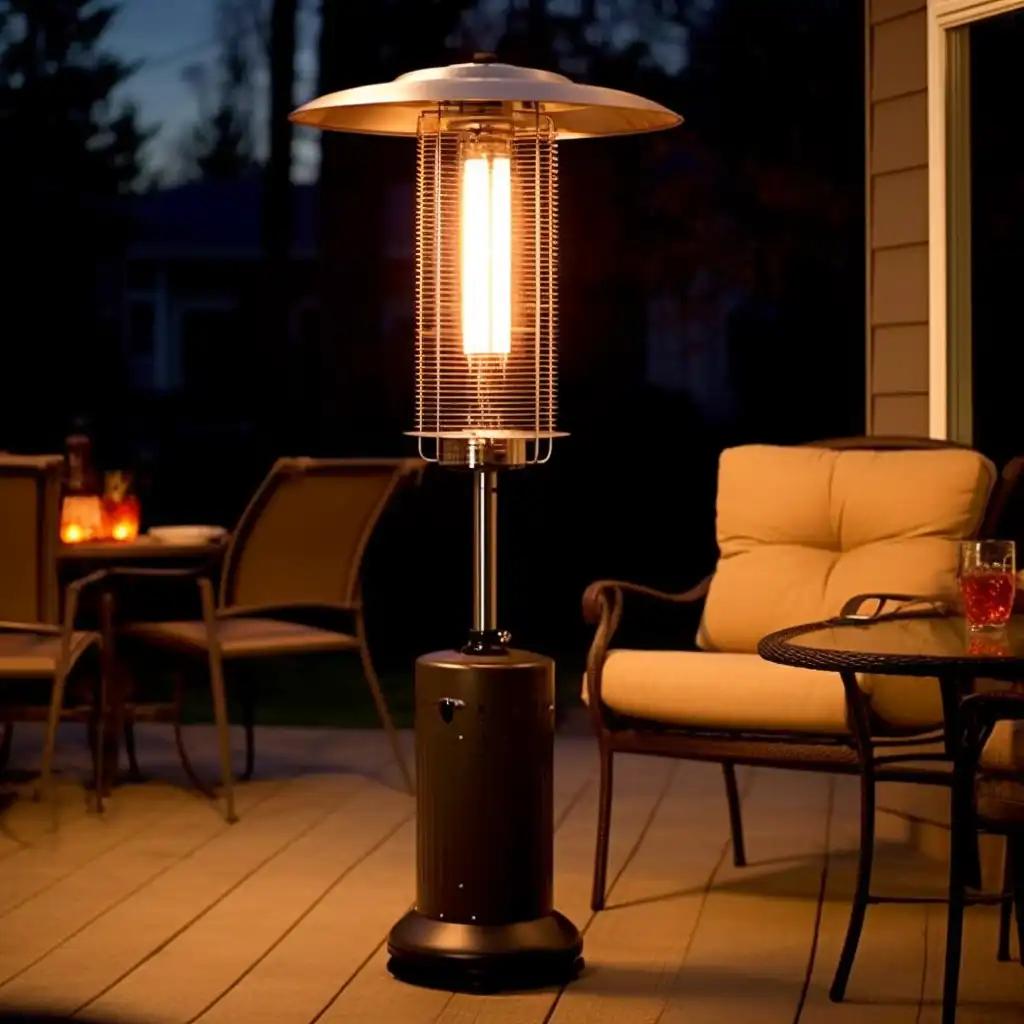
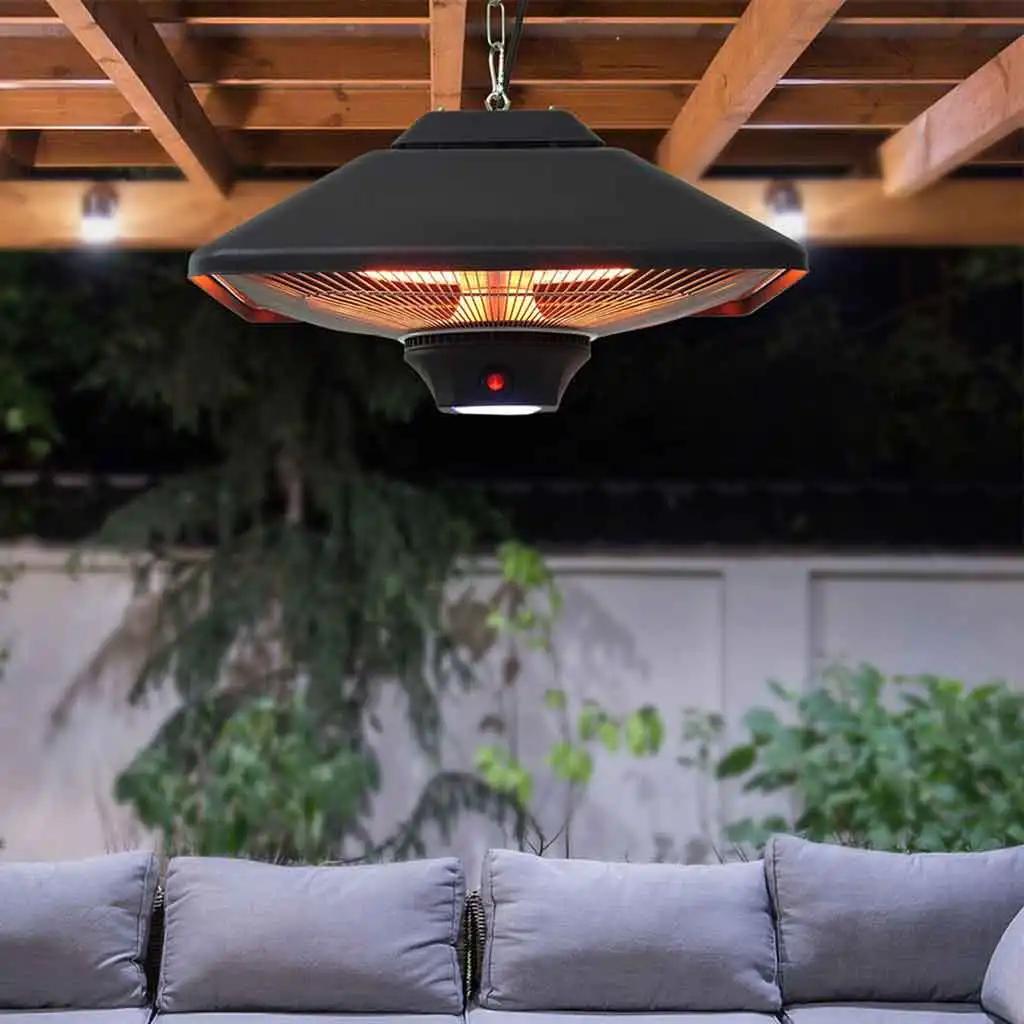
When it comes to creating a cozy outdoor space, a patio heater is a must-have. But have you ever wondered how close can a patio heater be to the ceiling? It's an important question to consider for safety reasons and efficient heat distribution. In this article, we'll review three popular patio heaters and explore their recommended ceiling distances. So, let's dive in!To understand the importance of the distance between a patio heater and the ceiling, we need to delve into the science of heat dispersion. Patio heaters emit radiant heat, which travels in a straight line. The closer the heater is to the ceiling, the more likely it is that the heat will be trapped, leading to inefficient heating and potential damage to the ceiling material.Part 1: General Considerations for Patio Heater Ceiling DistanceWhen choosing the position for your patio heater, there are a few factors to consider. First and foremost, safety should be the top priority. The heater should be positioned away from flammable materials such as curtains, trees, or overhanging structures. It should also be placed on a stable and level surface to prevent tip-overs.In terms of ceiling distance, it's generally recommended to keep a minimum of 3 feet of clearance between the patio heater and the ceiling. This ensures proper heat distribution and reduces the risk of damage to the ceiling. However, it's always best to consult the specific manufacturer's guidelines for the patio heater you choose to ensure you're following their recommended ceiling distance.The Legal Angle: Manufacturer’s Recommendations & Legal RequirementsIn addition to the manufacturer's guidelines, it's important to be aware of any local regulations regarding patio heater installation. Some areas may have specific requirements for the distance between a patio heater and the ceiling. It's always a good idea to check with your local authorities to ensure you're in compliance with any legal requirements.Now that we have a better understanding of the importance of patio heater ceiling distance and safety considerations, let's dive into the reviews of three popular patio heaters.

Read more about Barbecue Receipts and Grills Tips at foxheightspubandgrill blog
When it comes to creating a cozy outdoor space, a patio heater is a must-have. But have you ever wondered how close can a patio heater be to the ceiling? It's an important question to consider for safety reasons and efficient heat distribution. In this article, we'll review three popular patio heaters and explore their recommended ceiling distances. So, let's dive in!To understand the importance of the distance between a patio heater and the ceiling, we need to delve into the science of heat dispersion. Patio heaters emit radiant heat, which travels in a straight line. The closer the heater is to the ceiling, the more likely it is that the heat will be trapped, leading to inefficient heating and potential damage to the ceiling material.Part 1: General Considerations for Patio Heater Ceiling DistanceWhen choosing the position for your patio heater, there are a few factors to consider. First and foremost, safety should be the top priority. The heater should be positioned away from flammable materials such as curtains, trees, or overhanging structures. It should also be placed on a stable and level surface to prevent tip-overs.In terms of ceiling distance, it's generally recommended to keep a minimum of 3 feet of clearance between the patio heater and the ceiling. This ensures proper heat distribution and reduces the risk of damage to the ceiling. However, it's always best to consult the specific manufacturer's guidelines for the patio heater you choose to ensure you're following their recommended ceiling distance.The Legal Angle: Manufacturer’s Recommendations & Legal RequirementsIn addition to the manufacturer's guidelines, it's important to be aware of any local regulations regarding patio heater installation. Some areas may have specific requirements for the distance between a patio heater and the ceiling. It's always a good idea to check with your local authorities to ensure you're in compliance with any legal requirements.Now that we have a better understanding of the importance of patio heater ceiling distance and safety considerations, let's dive into the reviews of three popular patio heaters.
Read more about Barbecue Receipts and Grills Tips at foxheightspubandgrill blog
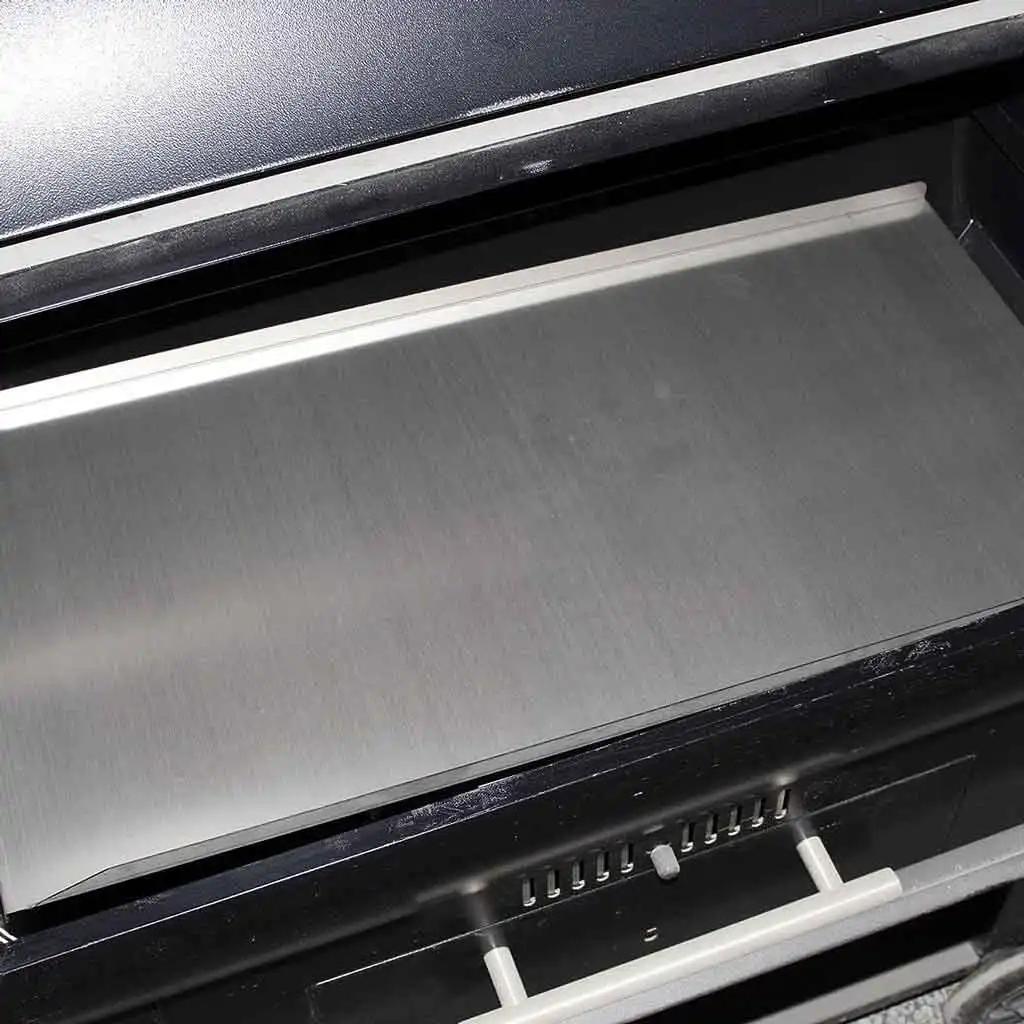
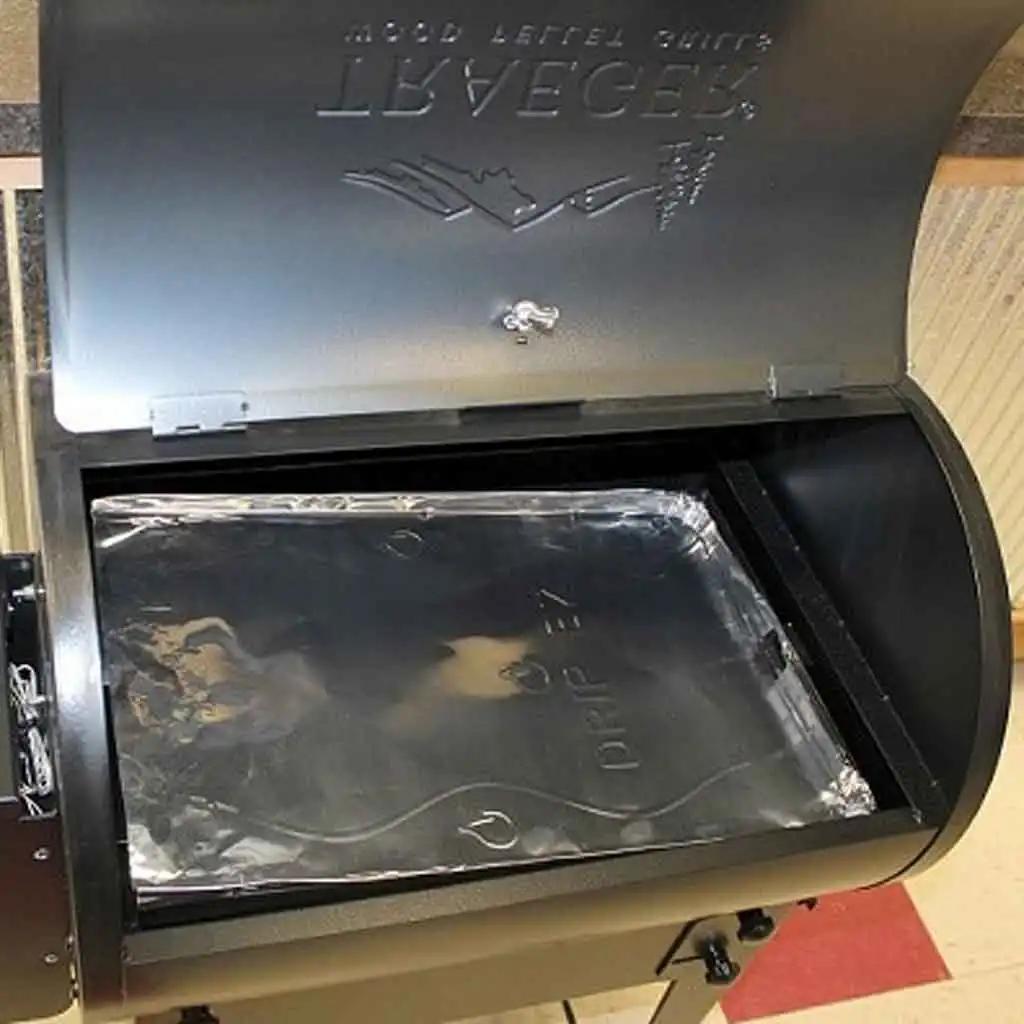
When it comes to BBQ equipment maintenance, it's important to pay attention to every little detail. One such detail is the drip tray in your Traeger grill. This seemingly insignificant component plays a crucial role in ensuring the functionality and longevity of your grill. But how often should you replace your Traeger drip tray? In this article, we'll explore the signs that indicate the need for replacement, the expected lifespan of a Traeger drip tray, and provide an overview of three popular products in the market.Part 1: When to Replace Your Traeger Grill Drip TraySigns that Your Drip Tray Needs ReplacementOver time, your Traeger drip tray can accumulate grease, food particles, and other debris. This build-up can hinder the tray's ability to effectively catch and drain the excess grease, which can lead to flare-ups and uneven cooking. If you notice that your grill is producing excessive smoke, experiencing inconsistent temperature control, or if the tray is cracked or damaged, it's time to consider a replacement.Lifespan of a Traeger Drip TrayThe lifespan of a Traeger drip tray depends on various factors such as frequency of use, temperature settings, and maintenance. On average, a well-maintained drip tray can last anywhere from 6 months to a year. However, it's essential to regularly inspect your tray for signs of wear and tear to ensure optimal performance.Part 2: How to Replace a Traeger Drip Tray [Ultimate Guide]Replacing a Traeger drip tray is a simple process that can be done in a few easy steps. Here's what you'll need and how to do it:Required Tools
Read more about Barbecue Receipts and Grills Tips at foxheightspubandgrill blog
When it comes to BBQ equipment maintenance, it's important to pay attention to every little detail. One such detail is the drip tray in your Traeger grill. This seemingly insignificant component plays a crucial role in ensuring the functionality and longevity of your grill. But how often should you replace your Traeger drip tray? In this article, we'll explore the signs that indicate the need for replacement, the expected lifespan of a Traeger drip tray, and provide an overview of three popular products in the market.Part 1: When to Replace Your Traeger Grill Drip TraySigns that Your Drip Tray Needs ReplacementOver time, your Traeger drip tray can accumulate grease, food particles, and other debris. This build-up can hinder the tray's ability to effectively catch and drain the excess grease, which can lead to flare-ups and uneven cooking. If you notice that your grill is producing excessive smoke, experiencing inconsistent temperature control, or if the tray is cracked or damaged, it's time to consider a replacement.Lifespan of a Traeger Drip TrayThe lifespan of a Traeger drip tray depends on various factors such as frequency of use, temperature settings, and maintenance. On average, a well-maintained drip tray can last anywhere from 6 months to a year. However, it's essential to regularly inspect your tray for signs of wear and tear to ensure optimal performance.Part 2: How to Replace a Traeger Drip Tray [Ultimate Guide]Replacing a Traeger drip tray is a simple process that can be done in a few easy steps. Here's what you'll need and how to do it:Required Tools
Read more about Barbecue Receipts and Grills Tips at foxheightspubandgrill blog |
 RSS Feed
